 I used embroidery to add a beak on my little Jolly Robin toy, and here is a little pictorial on how to do this. For the beak you will need about 1 metre of yellow yarn, and thread it onto a darning or tapestry needle. I find it easier to add the embroidery after seaming and stuffing the toy. 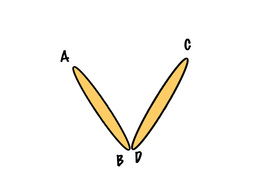 Steps A to D: After seaming and filling, secure one end of the yellow yarn by knotting it to the back seam (you can hide the short end later by threading on a darning needle, and then pulling it through the inside of the stuffed robin so it is hidden). Bring the darning needle up on the right side of the knitting at the top of the V for the beak (A), and then down to the centre of the V (B). Bring the needle back up to the right side of the knitting at the top of the other side of the V (C), and then down at the centre again (D). 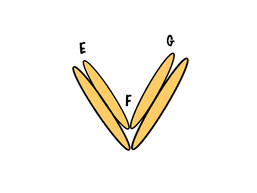 Steps E to G: Now repeat this process inside the first V shape. Come up to the right side at the top of the V (E), down to the centre (F), back up at the right side at the top (G), and down to the centre again (F). 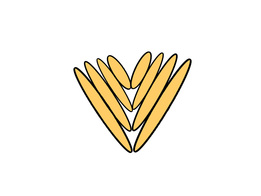 Next: Keep repeating this v-shaped process until you have filled in a triangle shape. You may want to double over some of the stitches to fill in any gaps. 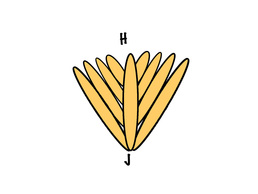 Finishing: Sew a vertical stitch the length of the beak (H to J). To finish, either knot the yarn on the wrong side, or if you have stuffed the robin, knot to the back seam and hide the tail inside the bird.
2 Comments
Glennys
3/5/2016 09:17:58 am
I have struggled with knitting beaks. Great instructions, Amanda! I really love your tutorials and knitting patterns!
Glen
5/3/2020 01:36:12 am
Fabulous way to embroider a bird beak. Love it and Thankyou! Your comment will be posted after it is approved.
Leave a Reply. |
